Just something I'm bringing home. It goes along with this post.
Hello Project Run and Play readers! It's Sally from Daisy Chain Creations, here to share a little detail that makes a tunic go from humdrum to whimsical...just add a little contrasting ruching (and an exposed yoke...but I'm not going to overwhelm you today).
Hello Project Run and Play readers! It's Sally from Daisy Chain Creations, here to share a little detail that makes a tunic go from humdrum to whimsical...just add a little contrasting ruching (and an exposed yoke...but I'm not going to overwhelm you today).
While we are just wrapping up the school year here (2 more days!!!), I'm already thinking ahead to the next year and this little gal's wardrobe. She'll be starting kindergarten and I want her to have some fun pieces that match her personality. She pretty much lives in hand-me-downs, which is really nice, but not necessarily her...do you know what I mean?
That is how this tunic came to be. She really liked the one I had made for her sister earlier this year, so I let her pick out the fabric for her first piece to go in her kindergarten wardrobe (hence the reason it's a little big...it is still 3 months away). We found the cute owl fabric at our local JoAnn's.
First, you want to start with a tunic like top. You could use any top pattern and just extend it, but I just traced a pattern from a shirt that fit her on the large size (make sure you account for seam allowances). You also want it to be a little longer, going below the waist so you can ruche it up.
Then you want to assemble the shirt and finish the bottom hem.

Now it's time to make the little placket and ties for ruching. You could use ribbon if you didn't want to make the ties, just make sure you do something to the ends to keep them from fraying.
The placket pieces are 2 1/2 inches wide. The length is up to you and how far you want it to go up the side of the shirt. For the ties you want them to be a couple of inches longer than your placket. I made mine 1 inch wide.
Next you want to finish the bottom edge of the placket with a small hem. ( I skipped this step because the I had a nice printed selvaged edge, which I figured was just as good)
Now you want to iron the sides and top in 1/2 and inch.
If you are making the ties, fold them in half right sides together, sew and turn. Then finish the edges.
Here's what you end up with and now you are ready to assemble.
You also want to snip the ties in half. You could potentially adjust this idea so that you use one continuous loop, but since I'm making it for kids I figured I wanted the top ends secure so I wouldn't have them getting pulled all the way through.
Now you want to mark the middle of the placket lengthwise (I just marked the top and bottom, but you might want to mark a line down the entire length).
Pin it to the side seam, making sure to line up the middle of the placket with the seam.
Sew along your line in the ditch of the side seam, all the way from the bottom hem to the top of the placket.
Next you want to pin the ties right next to the seam, one on each side. Let the ends stick out a little at the top.
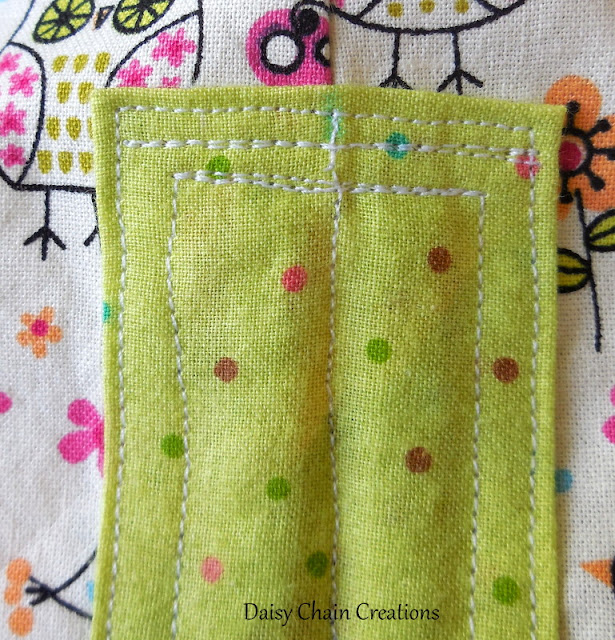
Now it's time to attach the rest of the placket. First sew around the placket, up one side, across the top (I always back stitch and come back across to make sure the ties are nice and secure) and then down the other side. First go around at 1/4 and inch.
Now you want to snip the ends so that they are not sticking out.
Still with me? We're almost done.
Sew around the placket again, this time with an edge stitch. I also added another row at the top to secure the ties good and tight...we're talking about a 5 year after all, so who knows how much tugging she'll do with those ties.
And there you have it...a cute ruched tunic.
Stop on over at Daisy Chain Creations to learn how to do the whimsical exposed yoke that you see on the tunic.
My first version of the tunic had the placket on the inside, which makes it a little less whimsical, but still fun to have some contrast going on.
Thanks for having me here on Project Run and Play!


No comments:
Post a Comment