Showing posts with label embroidery. Show all posts

Tuesday, November 5, 2013

Bumble Bee Dress Tour

It was my privilege to be apart of this wonderful little tour. RaeAnna just released a wonderfully versatile dress pattern and I get to be a part of the action.
Here are all of the other stops:
Maura Jean & Co|Boy, Oh Boy, Oh Boy Crafts|Pattern Revolution|Daisy Chain Creations|Get Your Crap Together|Zafarani|Welcome to the Mouse House|Designs By Sessa|Sew Like My Mom|Once Upon a Sewing Machine|Shaffer Sisters|Francess Suzanne|sewVery|Climbing the Willow|Blogs Like a Mother|House of Estrela|Rae Gun Ramblings|While She Was Sleeping|181ReUp|Feathered Ruffles
~~~~~~~~~~~~~~~~~~~~~~~~~~~~~~~~~~~~~~~~~~~~~~~~~~~~~~~~~~~~~~~~~~~~~~~~~~~~~~
Here's my little creation. I made view A, with a couple of little changes.
Since neither of my girls needed a new dress, even though the pattern goes up to size 12, I decided to make this little ensemble for my niece, which means I can't get pictures with her in it because she lives across the 'pond' way over in England.
The only thing I really changed was that when it called for ruffles, I did pleats instead.
As for the dress, this pattern came together like a dream. I think the hand embroidery took longer than the assembly of the dress. Seriously.
With 2 different options of dresses, there are many chances to make this dress your own.
For my dress, I used unbleached muslin for the bodice and a floral print from Hobby Lobby (that was actually gifted to me by these lovely ladies). 
I added the embroidery just to add a little more to the dress and the button was the finishing touch. This is my all time favorite button find and this one is my last one.
I'm kind of loving how the embroidery made the plain bodice stand out a little more and go with the other fabric instead of just fading into the background.
And just for fun I made a pair of leggings to go with the dress.  I used a t-shirt of mine that was fitting kind of funny. I just used a bloomer pattern to make up a pattern for the leggings.
And since I don't have a model for this cute ensemble here are a couple more pictures that hopefully show off how cute this pattern is.
Oh the possibilities with the Bumble Bee Dress!

So head on over to RaeAnna's blog and check out the give-a-way and the amazing pattern...it's on sale for $5 from November 4-18!

Tuesday, April 30, 2013

Last Day of KCW

 I finished up this little ensemble.  The polka dot and star onesies were 'printed' with Jaquard fabric dye and stamps. The QTpi is made using the freezer stencil method and the same dye.  The 'As You Wish' was embroidered by a friend.  If I tell you that my nephew's name is Wesley, do you get the reference?
And 2 more pairs of pants made from old t shirts using this tutorial.

Wednesday, March 13, 2013

A Little Wall Art

  A month or two ago we swapped the boy's and the girl's rooms and each got a fresh coat of paint.  We moved into our little ranch almost 2 years ago and haven't done much to it.  It was still painted the same beige all throughout the house (except the kitchen, which I'm going to tackle next).  Each of the bedrooms is now a different color.  The girl's is a lovely Spring green (not minty pastel) and I've been trying to decorate it.  This is the newest addition, the quote on the wall. (The flower picture is from here and the embroidery pattern from here--embroidered by me and changed every month)
The quote is from Anne of Avonlea and is one of my favorite literary quotes of all times.  It's from a conversation between Anne and Gilbert before they start their first year as teachers.  Gilbert just decided that he was going to be a doctor and change the world that way.  This is Anne's response (I did change the word 'them' to 'people' to make it make more sense):
I just simply wrote the quote out with pencil and then painted over it with acrylic paint.  The little shadow is actually a tracing of a paper cut pattern from a blog that I found, Sherenschnitte, and then I changed it up a bit by having her blow a dandelion puff instead of bubbles.
Once I get their comforter covers done, I'll do a little walk through of their room. There's a lot of homemade goodness in their room.

Friday, February 22, 2013

Quiet and Calm--This Week's Crafting

My crafting this week consisted of coming up with a costume for my 6th grader to make him look like Constantine.  Here's what we came up with:
circlet made from gold floral wire with a thin strip of felt whip stitched over the part where I twisted the two ends together.  Then we spray painted random fake leaves gold and hot glued them on(the felt served to cover the ends of the wire and to have a place to glue the leaves to).  The white drapey thing that went over one shoulder and pinned on the other is just 2 yards of white knit I have on hand for another project.  The gold brooch is 9 strands of the gold floral wire braided together and then twisted in a circle.  Then we spray painted it and glued it onto a white piece of felt that had a safety pin attached to it.
I didn't get a picture of him wearing it though.  He did look kind of spiffy.  Here's a bust of Constantine...not much to go on.
 I've also been working on this project.  I was working on this last year and only got to May, so maybe I'll get the rest done this year and get the sashes on the side sewn on.
(pattern by Sarah Jane)
Every time Project Run and Play wraps up, I take a break from sewing for a week or two.  But I'll be pulling out my sewing machine next week for some fun things to come.

Sunday, January 20, 2013

Sowing While You Sew--Week 1 Finished

Daisy Chain Creations

Completed Wall Art
My daughter finished her wall art project this weekend, however, amid a flurry of switching rooms with the boys and painting each room, I forgot to take pictures in the sunshine.  Once it's hanging in her newly painted room, I'll take better pictures.  She did a good job and got better as she went along.  That's the point right?

Some things we figured out...a needle with a bigger eye is better for learning how to thread and when sewing a button with a shank come up first, then go through the shank and then go back down into the fabric--don't try and combine any of the steps because it gets a little frustrating.

All in all, she enjoyed it.  She has something to show for her work and she learned some new things.

Another idea we thought of, at Christmas time you could draw a tree and use the buttons as the decorations.

I would love to see any that you have helped someone sew/create, so post a link if you can.

Tuesday, October 9, 2012

Project Run and Play--Week 5--Holiday Wear

My inspiration for this week's Project Run and Play challenge was 'Dresses Fit For a Celebration'.  Really these are their unofficial Christmas outfits, but they get worn for so many other things before Christmas...holiday parties, trip to the Nutcracker, Christmas service at Church, Messiah Sing-A-Long.  And some of these things are in the Fall still, so technically they are Fall Holiday outfits as well, that's also why I don't make them the typical Christmas colors.  Actually, I don't care if they qualify at all, because do you know how good it feels to have their Christmas outfits done?  REALLY satisfying!
I present:
A Little Holiday Cheer--2 Ensembles

Out fit 1--For Clara
Shirt with peter pan collar made from up-cycled cream knit shirt of mine.
Skirt from embroidered black fabric of some sort.  Simple gathered skirt with flat front and elastic in the back waistband and a separate maroon sash.
From the initial drawing, I added the buttons, placket and ruffles down the front and dropped the buttons at the cuffs.
Here is the final look:
This is the shirt I had in my closet, but never wore.  I went looking for cream colored fabric of some sort, but never found the right kind.  I saw this one day and went with it.
I wasn't planning on using the ruffled pieces, but after I had picked them off Clara saw them and really wanted them on her shirt as well.  I'm glad she did, because I like how they add to the shirt and make it a little fancier.

The embroidery on the collar was supposed to be another attempt at ribbon embroidery, but that did not work with a knit fabric at all, so it is simple embroidery thread.
Challenge for myself this week was to do a full placket with knit fabric.  The shirt is drafted off of a shirt of hers.  Then I added the button front placket and collar to it.
Close up of the embroidery and the perfect buttons I found at JoAnne's.
The skirt is a simple gathered skirt, with an underskirt and 2 layers of tulle in between.  The sash is just a long piece of finished maroon sateen.  I needed something to tie it all together and make the outfit more like a 4 year old.
The black fabric was picked up at a clearance of remnants at the high end fabric store here in town.  I loved the details and picked it up with a skirt for me in mind.  However, I like my clothes to last a couple of years and I imagined the embroidery getting snagged easily...but for a season on the girls it should work.  It did have some flaws already, which I tried to cut around and repair when I could.  In fact, I went around the whole scalloped edge again, because they had snipped the scallops to close to the embroidery and it was fraying really badly.

Outfit 2--For Sophia
A little more grown up look.
Simple shirt with button closure in the back out of the black embroidered fabric.
Skirt out of some soft grey wool.  Dropped the pockets (not dressy enough) and added kick pleats at the front and back of the knees with bows at the tops in the front.  I love how this skirt turned out!!!
Both are self drafted patterns. (I think I might do a tutorial on the skirt after next week)

 Initially, I had put an exposed shiny silver zipper on the back.  I did not like it at all.  Maybe it was the style of the skirt, the fact that I didn't have matching thread or whatever, but she looked like a skunk with a stripe on her little behind.  So I picked it out and added a hidden zipper instead.
 I didn't get any pictures of the back, but here's the front with the bows.  I added those last minute to make it look less like a business skirt and more suitable for a 9 year old girl. 

 As for the shirt, it's just another simple shirt with a button closure in the back.  It's fully lined and then enclosed at the bottom with a maroon hem/tie. 
 I think it turned out rather well.  The best part is that she has a couple silky red shirts that she can wear with the skirt as well to make it a little more festive. 
 Now on to some pictures.  It was a little too sunny, but you take what you can get when you have a busy week.
 Their sassy poses.
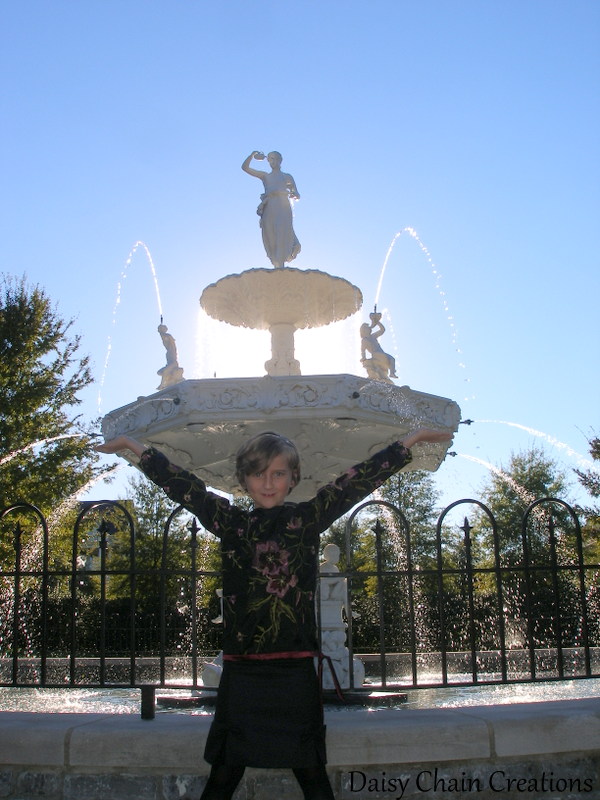
 "Look! I'm holding up the fountain!"
 Since the girls are most excited about wearing them to the Nutcracker, here are their ballet poses.
 This is the "Not another picture.  Aren't we done yet?" pose.

Thursday, May 10, 2012

Jane Austen Inspired Sprigged Muslin--Project Run and Play Week 5

I am a sucker for period dramas and especially Regency Era ones like those inspired by the works of Jane Austen and Elizabeth Gaskell.  My favorite Austen book is 'Northanger Abbey' and the 2007 adaptation of it is one of my all-time favorites.  This is my tribute to Mr. Henry Tilney, the hero of the book, who "Has an understanding of muslin."

 This week on Project Run and Play the task was to be something movie inspired.  I went with a sprigged muslin dress, inspired by those seen in the movies.  However, it really is a tribute to Mr. Tilney, my favorite Austen hero and who, since he has an understanding of muslin, must be a good guy.  
 I started with a simple, empire waste, white, muslin gown--not quite floor length, because I wanted my daughter to be able to wear it as a normal dress.  I gathered the bodice piece a little extra, before actually cutting out the bodice.  The dress (blogged about here, here and here as a top--this doesn't even count the times I've made this dress pre-blogging days and how many I've made without mentioning it) is based on my all time favorite pattern, one I've used countless times and one that I've used to teach many people to sew with.  However, I've done this pattern so many times and it only goes up to 4T, I just wing it now.  
 I then added some pin tucking at the bottom along with some little 1/2 inch pleats.  Then I had the crazy idea to make it sprigged muslin and taught myself to embroider with ribbon.
 I loved how it turned out.  The ribbon adds a three dimensional element to the design and if you twist the ribbon while you are doing a stitch, you get a different look than if you didn't.  I would love to try it with real silk ribbon, instead of the polyester stuff you can pick up at the craft store.  I imagine it would be completely different to work with.  As it is, I liked this look, but it was much harder to do (let's just say I had a Pride and Prejudice marathon working on this dress) and I have the calluses to prove it.

 And here is the finished look.  We had fun with this little photo shoot, fitting it in just as the sun was setting.

 The heroine of 'Nothanger Abbey', Katherine, loves to read Gothic novels and gets a little caught up in them, so I had to include some reading shots. 


LinkWithin

Related Posts Plugin for WordPress, Blogger...