Showing posts with label reusing. Show all posts

Monday, June 8, 2015

New Summer Staple--Wrigley Raglan

Are you looking for a great raglan shirt pattern? Well look no further! The newly released Wrigley Raglan from Love Notions is your one stop shop that has the raglan covered.
 It comes in a huge range of sizes, has 3 different collar options (crew, split or hooded), has 3 different lengths (shirt, tunic or dress) and has plus sizes as separate sizes.  It really  does cover it all!
 I was part of the testing and believe me, this one is a great final product. Both of my daughters (I couldn't stop at just one) love their shirts. They say they fit super well and are super comfortable.  There are more of these in our future.  This pattern is also a great one for upcycling those old large t-shirts (some great examples in the pattern pictures). Clara wants one with the Cardinals logo on it to where to school on Card's Day...now to find a shirt at a thrift store.  
 The other nice thing is the feminine fit of the shirt.  This is a shirt for girls and the high/low hem is a nice feature to that. 
By adding some length to the shirt, I also made 2 night shirts for my night gown loving daughter.
Our dog Max kept insisting on being in the pictures.
So now we have a new Summer staple, with many more of these to come.
And another great thing is the pattern is on sale until Saturday June 13, so go check it out over at Wrigley Raglan by Love Notions
The pink stripes and polka dots was her choice. The navy is from a stash I inherited from somewhere and it is super soft, so was perfect for pjs.

If you want to see the other version I made, you can check it out over at Sew Cool with the Tween Scene.

Tuesday, November 5, 2013

Bumble Bee Dress Tour

It was my privilege to be apart of this wonderful little tour. RaeAnna just released a wonderfully versatile dress pattern and I get to be a part of the action.
Here are all of the other stops:
Maura Jean & Co|Boy, Oh Boy, Oh Boy Crafts|Pattern Revolution|Daisy Chain Creations|Get Your Crap Together|Zafarani|Welcome to the Mouse House|Designs By Sessa|Sew Like My Mom|Once Upon a Sewing Machine|Shaffer Sisters|Francess Suzanne|sewVery|Climbing the Willow|Blogs Like a Mother|House of Estrela|Rae Gun Ramblings|While She Was Sleeping|181ReUp|Feathered Ruffles
~~~~~~~~~~~~~~~~~~~~~~~~~~~~~~~~~~~~~~~~~~~~~~~~~~~~~~~~~~~~~~~~~~~~~~~~~~~~~~
Here's my little creation. I made view A, with a couple of little changes.
Since neither of my girls needed a new dress, even though the pattern goes up to size 12, I decided to make this little ensemble for my niece, which means I can't get pictures with her in it because she lives across the 'pond' way over in England.
The only thing I really changed was that when it called for ruffles, I did pleats instead.
As for the dress, this pattern came together like a dream. I think the hand embroidery took longer than the assembly of the dress. Seriously.
With 2 different options of dresses, there are many chances to make this dress your own.
For my dress, I used unbleached muslin for the bodice and a floral print from Hobby Lobby (that was actually gifted to me by these lovely ladies). 
I added the embroidery just to add a little more to the dress and the button was the finishing touch. This is my all time favorite button find and this one is my last one.
I'm kind of loving how the embroidery made the plain bodice stand out a little more and go with the other fabric instead of just fading into the background.
And just for fun I made a pair of leggings to go with the dress.  I used a t-shirt of mine that was fitting kind of funny. I just used a bloomer pattern to make up a pattern for the leggings.
And since I don't have a model for this cute ensemble here are a couple more pictures that hopefully show off how cute this pattern is.
Oh the possibilities with the Bumble Bee Dress!

So head on over to RaeAnna's blog and check out the give-a-way and the amazing pattern...it's on sale for $5 from November 4-18!

Wednesday, October 16, 2013

From Old to New Again

My oldest son is in the high school marching band...and it's a serious thing.  Tons of practices after school, football games and competitions mean this band bag gets dragged around a lot and takes a beating.  After only a year, his bag looked like this:
 The top was pulled out and the grommets completely gone.  Being the frugal (and awesome...if I do say so myself) mom that I am, I figured I was up to the challenge of fixing it.  Two grommets and 1/8 of a yard of black duck cloth later and I had given new life to his band bag.
I love being able to fix things!

Wednesday, October 2, 2013

Flashback to my Tween Years

I think when I was in 8th grade I saw this idea in a teen fashion magazine and I tried it...probably my first try in sewing something I wanted to for me (rather than the forced projects for 4-H)
It was rather simple, just take a men's/boy's white button up shirt and hack off the bottom and sleeves then add lace or trim to the bottom. That's it.
 So I had a outgrown white shirt of the boys laying around and asked Sophia to pick out some trim to add to it. She also requested no collar so this was a little more time consuming than the original because I unpicked the collar stand and removed the collar, but she likes the finished look and it's a fun addition to her wardrobe for Fall.

Thursday, September 19, 2013

Bubble Gum Ball Pullover

 The inspiration for this outfit...the dot fabric of course! It looks like colorful bubble gum balls, so we went with that. Don't ask my 5 year old though, she's still insisting this is her lolly pop outfit because I originally thought I'd do 2 lolly pop outfits. Even though we went with bubble gum with this one, I still promised a photo shoot with the big lolly pops. Just like many things in life though, plans had to be changed. A cross country meet went an hour over and there were no lolly pops to be found, so it was just some quick photos outside of our house 15 minutes before we had to leave for school.
So here is my second candy inspired outfit for Project Run and Play. You can see the first one here.
Bubble Gum Pullover
I used the Nature Walk Pullover pattern by Olive & S and it was a quick easy sew.  The pants were a remake from a women's shirt.
Here she is discovering the side pockets aren't really pockets but more of a pouch...she was startled to find that her hands touched in the middle.
 The shirt I used to make the pants (don't you love the bubble gum pink stripes?) was a V neck with a little row of buttons on some grey binding. I liked the grey accent so I kept it and just added a panel to finish off the pants.
 Here's a better look at the pullover. I thought it opened a little too far down so I added the bias tape tie and decorative buttons

 Close up of the details.
Linked up to Train to Crazy
 And finally, head over to see the "Flip" for the month of September at Frances Suzanne. I'm one of the competitors this month.

Wednesday, July 10, 2013

Back from Vacation

Well I'm back from a 2 week vacation and break from being connected.  The kids and I were visiting my parents who don't have a computer much less the internet.  It's weird to disconnect for a while. (I do get email on my non-smart phone and when I visit my sister who is about 10 minutes away I hop on her computer to do things like check the bank account). The kids have a hard time with it at first, but in the end are outside climbing trees, picking raspberries and watching the hummingbirds.

While there I was able to finish and hand over this project, which was received with much joy.  I was asked (okay...I really volunteered) to transform my niece's wedding dress...
 (Strapless, knee length dress with twisted bodice and hand beading)
 ...to a blessing dress (same as a christening dress really).
 (The request was to try and incorporate the twisted bodice and as much as the shape as possible)
 In the end I was able to pick off the bodice and shape it into a baby appropriate bodice.  I sewed it into the sleeves, shoulders and side, but tacked it on at the top and bottom.  The back and front are all one piece (from the original dress...they were pieced originally obviously).  The sleeves are petal sleeves, mostly because I didn't have that many big pieces of fabric to cut out of.  I also added the beading around the neckline and added a couple of extra beads that were strategically placed on the bodice piece to keep it tacked down.  Finally, I lined the whole thing to keep little toes from snagging the beading threads on the inside of the dress.

Here she is on Great Grandma's lap.
 And here is the sweet family.  Sadly, they live in England so the next time I'll get to see her she'll be much bigger.
 And here is a picture with me.
 Finally, one picture of what we got to do while visiting.  I grew up in Gettysburg, PA and this was the 150th anniversary of the Battle of Gettysburg.  There were reinactors every where. While we were on the battlefield one day, Clara spotted this lady (who must have been sweltering on this 95 degree day) and wanted her picture taken.  The Southern lady obliged. 

Friday, May 3, 2013

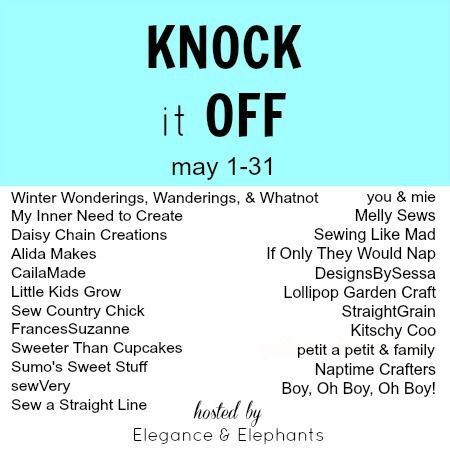
It's Time to 'Knock It Off' again!

Elegance & Elephants
Heidi, over at Elegance and Elephants, is hosting a Spring version of 'Knock It Off'. The challenge is to take a piece of children's clothing that is 'high end' and make it yourself for much, much less.
This time around I wanted to go casual.  For the winter, I made a fancy, yet very simple dress.  Last time I went Italian and this time I went French. I also went for shorts and a summery top this time around.  Guess which one costs more.
Here's the outfit I chose:
It's look #17 from Bonpoint and guess how much just the shorts and the shirt would cost you...around $300 according to the exchange rate I looked at for Euros.  That's just plain crazy!
Here's my look:
 My total cost--$5 maybe.
 I bought 2 yards of the fabric for with a 50% off coupon and probably only used 3/4 of a yard.    The shorts I just upcycled from a pair of jeans I got at Goodwill for 99 cents. The buttons were a dollar and I bought the gold colored jeans thread for just under $1 thanks to another 50% off coupon.
 I let Sophia chose the fabric.  I just wanted something light weight to mimic the look of the Bonpoint shirt, but I wanted her to love the shirt so floral it was.
For the neck and arm holes, I just used bias tape made from the fabric. I used the bias tape to make the bow too.
I really like how the shirt turned out! I just used my self drafted pattern for a button up shirt that I've used a ton of times now.  To get the little gathers under the back yolk, I just added 2 inches on the fold (4 inches total) to the back piece.  Then I just did the bias tape instead of a collar and sleeves.  I forgot that I was going to make the shoulder a little wider to make it hang over the shoulder more, other than that it is perfect and she loves it.
So to get this look you can use any button up shirt pattern. Just add the little extra to the back, don't add the collar or sleeves and finish with the bias tape instead.  Very easy and summery.
 The shorts however, turned out kind of funky, but she says they are comfortable and wants to wear them. The pants I used were more of a stretch jean fabric and I wish I would have gone with actual jean material because it turned and twisted a little.  
I simply cut the front from the pants, using a pair of her shorts as a guide. I included part of the zipper and the back I used the seam from the back middle. I also reused the waistband/belt loops. I just picked it off the jeans and cut to length which allows me to use the existing button hole as well.  
For the welt pockets, to remind myself how to do it I followed this tutorial.  There was plenty of fabric in these pants to get the pockets and welts. And I have plenty left over to attempt a pair of baby jeggings for a new niece. One thing about this stretchy fabric was that a thinner welt did not work.  Maybe if I treated it more like a knit it might have, but I would love to try it with actual jean material and see how it looks.

And here is the look:


LinkWithin

Related Posts Plugin for WordPress, Blogger...