Showing posts with label practical crafting. Show all posts

Thursday, April 16, 2015

Not a Lot Going On Here

I would like to say I'm sewing up a storm...but I'm not.  I managed to get these curtains done before we had visitors come for Easter.  That's about all of the sewing I've done in the past little while. (Remember my post from a while back...? So I didn't go black and white, but did go geometric and simple)
The fabric is this navy blue wax resist dyed loveliness that my husband brought back for me from Ghana, way back in January. It's only taken 19 years for him to learn what I really want as a souvenir:)

I left the side edges raw (they even wax resist dyed the name and some other things on the side) and then simply used a rolled hem for the top and bottom.  I didn't want to waist any of the fabric by hemming too much.  As I was cutting it out to the measurements, last minute I remembered to make sure that the circles would line up from panel to panel...that was a close call.  I'm kind of loving how they look. Simple, yet stunning to look at. And they are simply hung with little clips on a simple rod.
As for what has been keeping me busy, besides chauffeuring my kids around, on the days it is nice outside...I love Spring...I've been outside discovering what our flowerbeds have to offer. Since we bought this house and moved in July 1st, what blooms in Spring is a nice surprise. Every day it seems like it is something new, awakening to the warm sunshine that has become more the norm.
So here are some of the surprised for your enjoyment.


 One night a couple of weeks ago, there was a chorus of probably 50-80 of these guys in our little pond...it was loud! The result is now a ton of tadpoles swimming around. The girls are having fun with daily observations...got to love backyard biology!
 And this lovely sight is from a drive on Easter around a local park. How many turtles can you count?

Wednesday, October 23, 2013

Keeping Busy

You know that little dream you have when your kids are finally all in school and you will have so much time to get to all of those projects you've been putting off for years?  Call me when you send your last to school and I'll fill you in with the reality...it hasn't happened yet for me.  My day seems to fly by and if I didn't have this blog I would wonder what I've accomplished.  At least here I document some of what I do so that I have a little record of my time spent.  I have been busy and am still sewing. Lately, most of my sewing has been documented over at Sew Cool for the Tween Scene, so go check out my latest review if you want to see some sewing for my kids.
 As for other projects, they were all put on hold for these that I volunteered myself for.  You see I firmly believe in serving others through your God given talents. I think sewing is one of my talents, so I do what I can with it.  This is a bunch of dance costumes that need to be altered (and these are the easy ones...there's a whole other batch that will require some thinking and time to fix). The 2 companies, a junior and a senior one, at my daughter's dance studio perform all year round at places like nursing homes and children's hospitals (one of the things I like about this place...they don't do a Christmas/Winter recital just so that they can focus on serving the community). Anyway, that means they need their costumes now, so I'm tightening straps and taking in some bodices.
 These are going to be super hero capes. My oldest, who is high school, will be headed to Grand Nationals with his marching band in a couple of weeks up in Indiana. Instead of wandering around the mall for hours in their down time between performing, the parents thought it would be a good idea to do something service oriented. They found this project called The Hero Project and plan on having a cape for each member of the band (160+) to give to one child in the hospital up there.  The capes come to me cut out and I just add the applique and sew the inside and outside together. Someone else is adding the velcro. Pretty easy on my part and just something little I can do in my own little way.

Wednesday, October 16, 2013

From Old to New Again

My oldest son is in the high school marching band...and it's a serious thing.  Tons of practices after school, football games and competitions mean this band bag gets dragged around a lot and takes a beating.  After only a year, his bag looked like this:
 The top was pulled out and the grommets completely gone.  Being the frugal (and awesome...if I do say so myself) mom that I am, I figured I was up to the challenge of fixing it.  Two grommets and 1/8 of a yard of black duck cloth later and I had given new life to his band bag.
I love being able to fix things!

Friday, August 9, 2013

The Wheels on The Bus

Today is back to school time for my kiddos and I've got one starting kindergarten this year. Yikes! How the time flies...and she's my last.
Perfect timing for all of this back to school hullabaloo is this 'Back 2 School' pattern bundle (We're talking 9 patterns here!) offered by Chelsea from Get Your Crap Together.
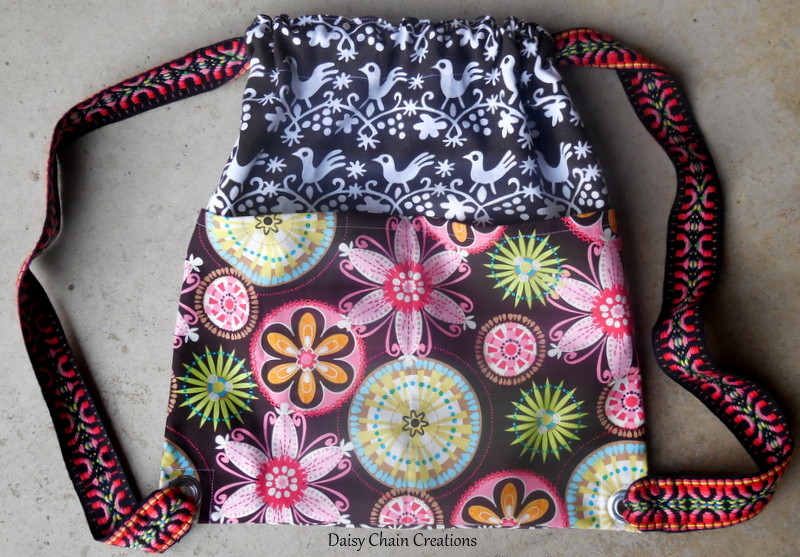
After some consulting with Clara on what she wanted here is what we came up with. I declared I was going to use the bird print canvas (picked up from my mom's stash this summer) and she picked the other fabrics and lucky me, I already had some zippers to match.
The pencil pouch is perfect for holding all of school's necessities all in one place and will surely get a lot of use. The only thing I changed was that I added a row of top stitching by the zipper to keep the lining in place for her little hands which are still getting the hang of a zipper.
 Here's a peak inside...I just love the bright pink polka dot that she chose.
The coin purse is exactly the same as the pencil pouch, but smaller and perfect for keeping that lunch money in one place.
 The crayon roll is probably her favorite and has been carried all around the house. I love how I was able to tie in all 3 fabrics with it.
  It sewed together really fast and Chelsea's instructions are spot on and easy to follow.
 Clara has seriously colored so much more since I made this for her...if I'd only known I would have sewn one long ago:)
One final look with it all wrapped up.
 Okay, I take that back, this is definitely her favorite and has been on her back for a week now. I've had to ask her to take it off at meal times and bed times many times this week. 
Again, the bag sewed up really fast and the instructions were great, especially for attaching the straps of the bag.
I used some awesome woven cording (again from my mom's stash) instead of ribbon. I like how sturdy they seem.  At Clara's request, instead of sewing the cording into the bottom of the bag like the instructions said to, she wanted the "metal hole things like in the brother's bags (their sports bags)", so I added grommets and then sewed the cording extra good together after looping it through the holes. 
 And there you have her complete set...all ready for kindergarten!
 Check out Chelsea's blog for more "Bus Stops" and for a great give-away of her pattern pack!
Get Your Crap Together

Monday, March 25, 2013

Sowing While You Sew--Week 11 Yet Another Amazing Guest Blogger

Daisy Chain Creations
It's Monday, so that means another amazing guest blogger.  This week it's Stacy from the Land of K.A. and her lovely daughter, Anya and they are making a tote bag. I love how Stacy still sews for her older children (she has a boy too).  She is one of the people that has inspired me to keep sewing for my 9 year old (I've given up my 12 and 14 year old boys as a lost cause).  I love her style and how she includes her children in that style!
 
If you are wanting to do something for charity, that is a little different, nursing homes take walker caddies, which are very similar to tote bags.  Really the only difference is that you put the straps on one side only and add velcro to the other.  Here is a tutorial for you, if you are so inclined.  Now on to our guest post...

Hello, Daisy Chain Creations readers! My name is Stacy and I blog at The Land of K.A. I have been blogging for probably 6 years or so, and my blog is some sewing, some cooking, some photography...it has evolved and changed over the years. Right now I have been pretty lax in my blogging (and sewing!), and I am hoping that changes soon. I am very glad Sally invited me to participate in this series. It has been fun to read and fun to finally get my daughter to sew something. Anya was really interested in learning to sew this time. This tends to be something we struggle with here. Sometimes she wants to learn and then she gives up in about 10 minutes. This project really allowed her to do a lot of the work and stay engaged. The straight lines on the tote bag are pretty easy to do for little kids. First, she picked out her fabric:

DSC_0016
Then, we decided how big we wanted it to be. I marked with fabric chalk the line she needed to cut, so it was easier for her to see what she needed to cut:
DSC_0018
She cut along the line:
DSC_0019
I introduced her to French seams. I wanted her to use the sewing machine and not the serger, which doesn't have a "turtle" speed on it. In doing so, the edges needed to be finished in some way. First, we did the side seam, and then we did the bottom of the bag.
DSC_0020
We just did one long strap, and I ironed the seams down for her before sewing. She sewed all the way around it, and then it was attached to the bag. I went over that whole, Don't-sew-over-your-pins-or-it-can-break-and-shoot-you-in-the-eyeball rule of thumb.
DSC_0021
All done and she is very happy with it!
anya's-bag-500
Now she wants to make some clothes. We shall see how that goes! Thanks, Sally for having me!

Thank you Stacy and Anya for stopping by!  I totally love the fabric choice for the bag...great job Anya!

Monday, March 11, 2013

Sowing While You Sew--Week 9 Another Amazing Guest Blogger

Daisy Chain Creations
(If you are new to this series you might want to check out the 'why' and the 'past entries')

Today, we have with us a wonderful blogger who I've admired for quite a while.  I love all of her creations and how she uses her skills to not only dress her children with style, but to make her home a better place.  She is one talented lady and I present her to you today:

Hello Daisy Chain Creations readers, I'm Rachel and I blog at nest full of eggs. Sowing While You Sew is such a great series, I'm so glad Sally invited me to contribute. You know, when I was growing up I learned many types of sewing skills (hand embroidery, cross stitch, machine sewing, quilting) during 4th and 5th grade summer school (which was free). I also took some sewing classes during Junior High School. Nowadays I don't think many schools offer these types of classes anymore, so if we want our children to know some basic sewing skills, like how to sew on a button, for example, we have to teach them ourselves. And what a perfect opportunity to do to some sewing projects together would be during those 3 long months off of school during the summer, just something to keep in mind when you're making those plans for the summer.

Anyway, today I'm going to share with you what I've done to teach my son how to sew.

Back when he was 4.5 years old, I cut out a piece of burlap from an empty rice bag, and placed it into an embroidery hoop.

 Besides sewing, I also knit, so I always have some yarn and a tapestry needle (thick blunt metal hand sewing needle) on hand.
 He took these tools and materials and hand sewed a yellow flower and white star.
 Fast forward 5 years to now when I recently told him: "I'm going to teach you how to sew. You can use my sewing machine." And my 9 year old son said: "Finally!"

The whole goal was to start out simple and teach him how to sew a straight line on the sewing machine ~ he started with a very easy instant gratification project called: canvas loose-leaf paper project.  It's such a great little project, it is simply sewing one red, then many blue straight lines on a small size rectangle canvas fabric. In the end you have a piece of fabric that looks like a piece of loose leaf paper!

The first couple of lines I placed a strip of yellow tape that he used as a guide...
 then the rest of the blue lines he used the edge of the presser foot as the guide. He quickly discovered that the harder he pressed on the foot peddle, the faster the sewing machine went and there were smiles and laughs when he went really fast!
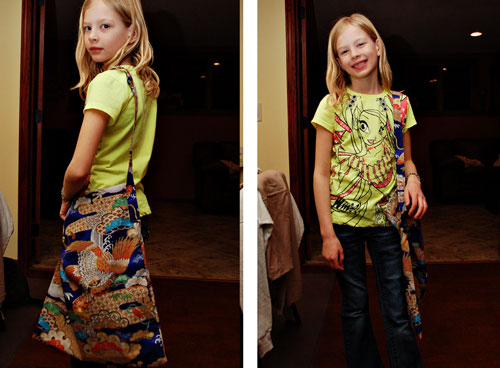
 So after he got some practice done, it was on to the drawstring backpack. I wanted to make this fun for him, so I made sure to include his favorite colors. Solid yellow pima cotton fabric and red thread were used for this project. I also thought that a darker thread on a lighter fabric would make it easier to see what he was doing. This is a simple flat tote where the drawstrings are also shoulder straps. The 2 drawstrings are anchored in the lower corners and gather in the top hem channel. In case anyone is interested, this drawstring backpack is made out of only one piece of fabric cut 12"X32" and two cords that were cut 60" long. After sewing several straight lines, he was done! A drawstring backpack is a perfect beginner sewing project, I had no idea that it was so easy to make.

To add to the fun factor I made a teeny tiny sized drawstring backpack for his favorite tiger stuffed animal. 
 My son also created a LEGO sewing machine!
I gathered some resources that might be helpful with sewing a drawstring backpack:
Thanks so much for having me Sally! I look forward to the remainder of this series.

Gifts are for giving, so I encourage you to pass on your sewing skills onto your children. Have fun sewing with your kids!

Monday, February 25, 2013

Sowing While You Sew--Continuation of Week 6

Daisy Chain Creations
(If you are new to the series you might want to check out the intro or the other weeks)

Today another guest poster sharing a quilt they did with their daughter.  This time it is from Justine, the amazing talent from over at Sew Country Chick.  You should check out some of the clothes that she sews.  The thing that caught my attention when I first saw her blog was that she sews amazingly fashionable clothes for her older children as well.  That's also why I asked her to contribute.  Without further ado:


Hello Daisy Chain Creations Readers! I'm Justine from the Sew Country Chick Blog and happy to be sharing a kids' sewing project with you today.
I'm sharing my daughter Lily's favorite sewing project with you, a quilt we made for the County Fair when she was eight years old. Lily wanted to make a project to enter into the Ventura County Fair so I trolled around the internet to some of my favorite sewing sites and I found a tutorial for an easy picnic quilt with rock pockets on the  at Sew mama sew.
 I myself, had never made a quilt before so this was a learning experience for me as well.  I prefer making clothing..... but this proved to be the perfect project to make with my then 8 year old daughter and her best friend who helped with the quilting, I cut out all the fabrics for Lily's quilt. Lily really balked at the thought of cutting out so many squares, 16 in all. Whatever it takes to get them interested, right?
                                                                
A simple quilt like this is an easy project to make with kids. They only have to sew straight lines.
The back of the quilt was simple. It was just a plain sheet with pockets to hold rocks on the corners. The girls enjoyed the quilting process and chatted while they knotted the squares on the quilt. It was a regular old fashioned, quilting bee I'd say!                                                                                                              
Lily was so excited to receive her ribbon!
Thanks Justine and your lovely helpers.  What a great idea for a picnic blanket with pockets for rocks!

LinkWithin

Related Posts Plugin for WordPress, Blogger...