Here's the tutorial I did for Project Run and Play over the summer.
On a side note, a new 'season' is getting ready to start and I plan on 'playing' along, so check back for some new fall fashions.
On a side note, a new 'season' is getting ready to start and I plan on 'playing' along, so check back for some new fall fashions.
Two different versions. The striped one I made for Sportswear Week.
--Start with any basic shorts/pants/skirt pattern that has a waistband (looks best if waistband is at least 1 1/2 inches in width when finished), with elastic only in the back and it's a flat front waistband. I draft a shorts pattern for my daughter every summer, because we can never find ones that fit her right. For a how to draft a shorts pattern, check out this post. *Quick tip at the end on how to adjust for waistband with elastic all the way around.*
--Sew up shorts to the point of attaching waistband. You can take any pattern and adjust it to this idea by measuring your child's waist. Divide that number in 1/2 (Front and back pieces). For back piece add 2 inches. For front pieces (one for each side of the bow), subtract 1 inch. If you are using a pattern that would normally have elastic all the way around, you might have to gather the front before attaching the pieces.
--Attach back waistband piece. Make sure to overlap towards the front at the side seams. Iron seam out.
--Fold down and iron seam allowance on other side of waistband piece.
--Finish back casing by folding over and sewing from end to end. Make sure to top stitch for nice finished look. My daughter likes it when it "ruffles", so I use a smaller width of elastic and add a row of stitching to match the width of elastic.
--Thread in elastic and anchor it. (Notice the overlap towards the front.)
--Here's the finished look for the back waistband. See the ruffle created by using smaller elastic?
--Now time to create front bow/waistband.--
--Take one waistband piece and sew point. Repeat with other piece.
--Trim and turn.
--Fold down and iron 1/4 inch at other end.
--On the front of the shorts, create a little binding, just to reinforce the seam and where the bow will meet.
--Attach one side of the bow. You only attach from the end to about 1/2 inch from the middle seam of the shorts. Make sure end encloses the back waistband piece.
--Fold over and finish. Make sure to enclose the back waistband. Finish piece off about 1/2 inch from middle seam.
--Attach and top stitch. Start where bow separates with shorts and stitch around entire piece.
--Repeat with other side. Pin back first side to keep out of way (I learned the hard way:)
--When finishing second side, make sure to meet as close as possible with as little as gap as possible, but don't stress if it doesn't. The loop will hide it:)
--Create loop. You can use ribbon if you want or create a tube of fabric, turn right side out and sew ends together. Attach to top of middle front seam. I've tried to use a machine for this step, but found it's just quickest to hand sew.
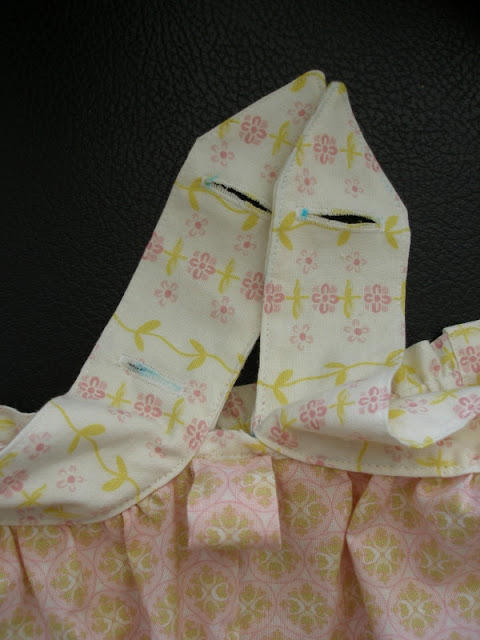
--Mark spot for button hole to pull other side through. Make it right above middle seam. Make button hole length 1/2 the width of waistband--just make sure you center it.
--Now you are able to pull other side to the front. Thread the piece with the hole in first through loop. Thread in other piece and pull through button hole as well. The loop hides the button hole.
--Now mark where you want the buttons to go and make the button holes. Sew on the buttons and you are done. This really isn't for adjusting size...it's just a fun variation to the standard waistband:)
--You can use the same idea to make fun leg bands, you just have one piece that goes all the way around instead of two. To make the ties seen in the striped shorts, just make a point on both ends of a band that is twice as long as needed. Finish similar to the waistband.
*If you want to have this look, but still have the elastic go all the way around, just make the 2 bow pieces and attach them to the waistband pieces when you are sewing the front and backs together. This means that the bow pieces are only attached at the sides, not in the actual waistband to shorts seam. Then finish as above.*


ReplyDeleteساندویچ پانل