Showing posts with label design. Show all posts

Monday, November 10, 2014

Betty Skirt Tour

So a couple of weeks ago I learned I was the lucky winner of one of the Abilmente Prize packages given by Annika over at Naeh-connection (seriously, I felt like it was Christmas morning) and part of the package was this lovely bundle of Cotton and Steel "At the Zoo" from The Fat Quarter Shop.
I decided that the fat quarter bundle would be perfect to make this pieced Betty Skirt, since I get to be part of the Betty Skirt Tour.
The lovely ladies over at the Shaffer Sisters have put out this great basic skirt pattern that has tons of options. The Betty Skirt makes a great go-to skirt because it's simple to make, but the pattern allows you to personalize it to suit your needs.
I chose to do the large pleated option, but decided to make each pleat a different fabric from the bundle. This worked out perfectly because the longer width of the fabric was exactly twice what I needed, therefore the front and back pleats are exactly the same.
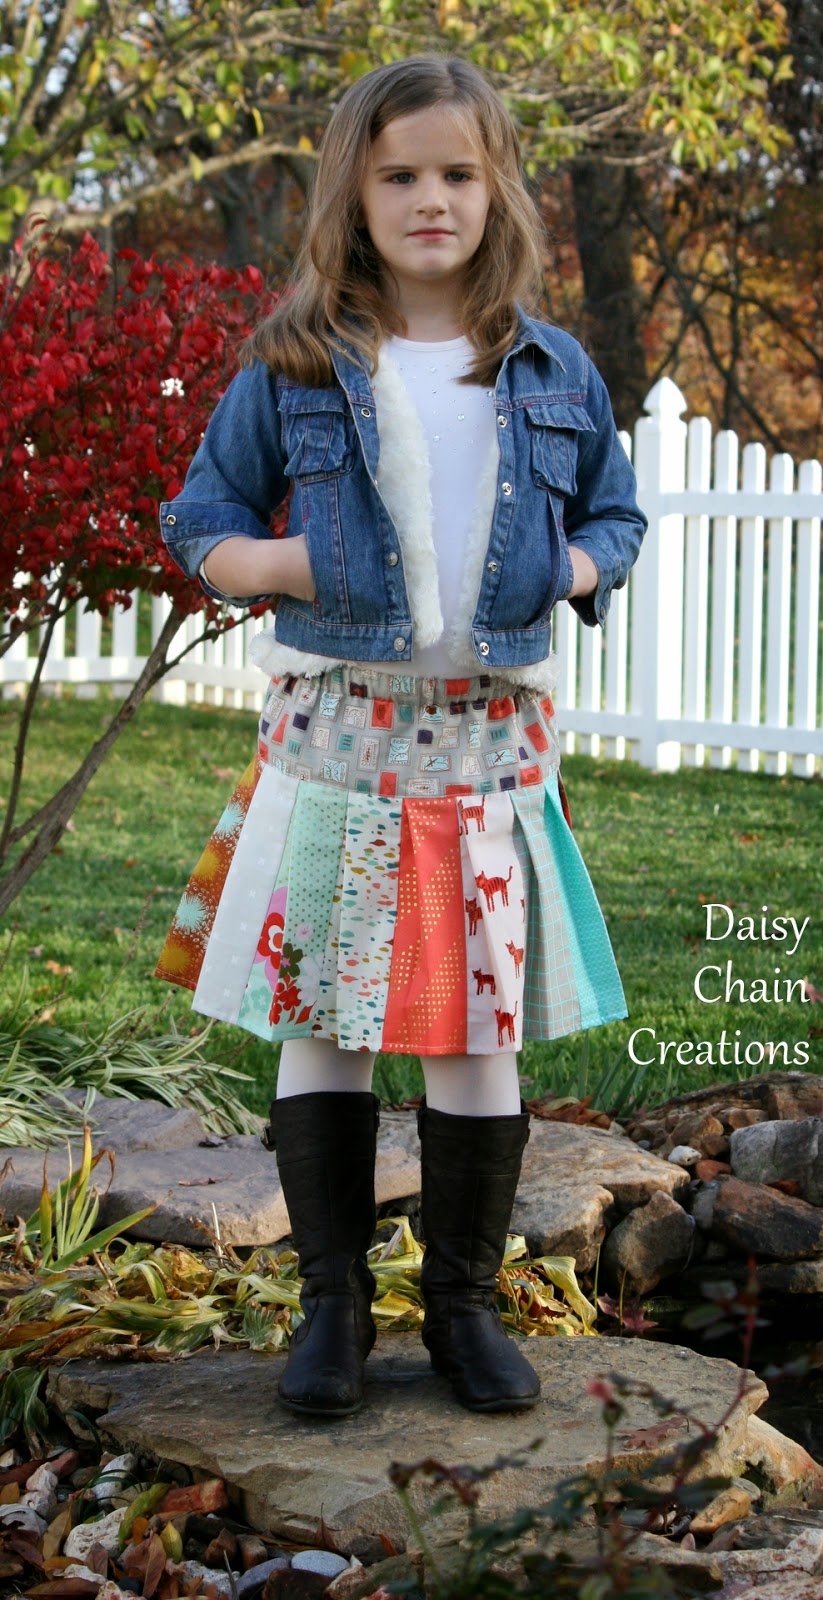
To get the pleats, I took the measurement of the pleat guide between pleats and added a seam allowance of 1/2 an inch, cutting the strips to the length I needed. Then I sewed them all together, pleated it (using the seams as a guide...no marking needed) and added it to the yoke.
This silly girl loves how it turned out. Even my 11 year old likes (and since they kind of wear the same size...I think she has her eye on it). The fabric was lovely to work with and such a visual treat!
As for the Betty skirt...you just need fabric and elastic (you do need buttons for the one with the placket) and that is it! It comes together fast, comes in a huge range of sizes, and has well written instructions.
Another plus...it's got great twirling factor...that means a lot in this household.
So if I've piqued your interest, you should go and check out the other stops on the tour...there's been some beautiful creations, and then go and buy it yourself with the discount code!
Displaying betty-skirt-tour.jpg

Now for a slightly random change of subject...this is my normal camera lens (it is just the kit lens...nothing special). It wasn't working so thanks to the invention of YouTube I thought I'd try to fix it myself. It was going to cost more than a new one (and the cost of the camera itself, since I bought it used) to get it fixed, so I thought I'd give it a go. I figured out the problem, ordered the part and all that is left is for the part to arrive and me to hopefully assemble it back together perfectly:)  I've been using my distance lens for my pictures the last little while...there's been a learning curve, but I do like how some of them are turning out.

Friday, November 7, 2014

Ansley Top/Dress Blog Tour

Lucky me, I get to be a part of this Ansley Top/Dress Blog Tour twice. You can see my other look over at Sew Cool.  And can I just say, I love this one a little more and I really like this great pattern!
This pattern is so great because there are SO many options! 2 dress options, 2 top options, 6 sleeves, 3 collars and 3 hems.  And the other great thing is that you get from size 9m to 14...all in one pattern!  It is seriously a great bang for your buck.
I did the high/low hem...which is such a great look with this loose top/dress pattern. I think the only thing I would change is to add an inch or two to the front piece...my girls are just so long in the torso and it hits them just at a weird length there. Oh, and get this, I made the same size for both of them. I'm not sure if they will want to share or not...

I added the pointed collar, which was so easy to add. I did add some top stitching around the collar and placket, which wasn't in the instructions...it's hard to see, but it's there.

And I just made up my own sleeve option...because there weren't enough already:)  No, I just thought the long loose sleeve look would go well with this fabric. I just took the short sleeve option and elongated it to be long enough. Then I just added a casing and elastic at the cuff.

As for the fabric, the floral was from a shirt that I picked up on the sales rack for $2 and the stripe is some light weight woven that I picked up on a random WalMart stop looking for a tiny screw driver set and I just really liked the look of it.

It was rather windy and chilly this morning when I took the pictures...hence the not so happy outside shots and the smiley inside ones.  But I do like the look we put together.
As for the pattern, it's a well written pattern that has the layering print options of not just printing the pieces you need but the sizes as well.

So there you have it...the Ansley Top/Dress, which you can go get with the discount code, ILOVEBLAVERRY10. Then go and check out the other amazing creations with the tour.
Displaying AnsleyTourBanner 1.jpg


November 6th

November 7th

Thursday, August 28, 2014

Another Flip of the Sis Boom Ethan Shirt Pattern

Since it's such a great pattern I had to give it another go...
my second FLIP for the ladies over at Frances Suzanne.
And whew! I made it by the hair of my chinny chin chin. 
Yes this is another FLIP of the Sis Boom Ethan Pattern. Much different from my other FLIP.
 This time it's a dress with an Asian flair.
 I left off the collar and just used the collar stand to create a Mandarin collar.
 I added 2 pockets, made it dress length, and cuffed the sleeves with a tab.  All accented with black piping. 
 She likes it. I like it...although it kind of reminds me of Sound of Music.
 You should really check out this pattern...it's a great one with so many possibilities!

Wednesday, August 20, 2014

Sis Boom's Ethan Shirt Flipped

The lovely ladies over at Frances Suzanne are doing their FLIP series again and this month was for a pattern that I've been eyeing for some time.
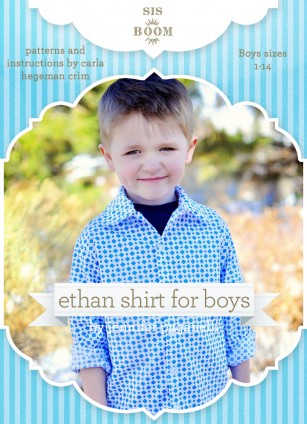
So with the incentive of a discount code, I bought myself the pattern, Ethan Shirt for Boys by Sis Boom and...
EthanPatternCover
flipped it into something much more girly.
Here is my FLIP of the Ethan Shirt...a collared tunic in a mix of fabrics.
The blue is poplin, with red with white polka dots cotton woven for the pocket and inside the collar stand and then a very soft, cherry printed knit for the tunic skirt and sleeves. The buttons are these really cool vintage ones from my stash.
As for the changes, I made the bodice by the pattern, chopping it off at the chest, just below the pocket placement.
I rounded off the collar, to make it a little more feminine and added some red stitching around the edge before attaching it, for some contrast.
I cut the inside of the collar stand out of some contrasting fabric as well for a fun pop of color.
The big change was adding the 'skirt' and making it tunic length. I made the skirt all one piece and over lapped it in the back. To do this I measured the front and back width, adding the back width in again to get the overlap. Then before I attached it I lettuce ruffled the edge of the knit in red thread and rounded the back corners.
The sleeves are out of the knit as well. I used the sleeve pattern piece and just cut them the length I wanted and lettuce ruffled the edge in red thread. I had originally planned on making a cuff at the upper arm out of the blue and the red, but I just didn't like the way it looked...to busy for a comfy tunic.
This was the first time I sewed a Sis Boom pattern and I was impressed with the way it was written and how the shirt came together. The pattern had some new to me techniques/way of doing things, which was a fun change of pace and I learned something new.
I love how the tunic turned out and Clara loves how comfortable it is. It's perfect to wear with shorts and will be great to wear with leggings in the winter.

Wednesday, June 25, 2014

Summer Fun with the Breeze Top Tour

Are you looking for a great summer top that is easy to make and perfect for summer in so many ways? Well the Breeze Top/Tunic just might be the one you are looking for! Shannon of Little Kids Grow has produced another solid pattern that is sure to become a staple for the summer wardrobe.
The top has a simple lined razorback yoke that was surprisingly easy to sew, as Shannon does a great job with instructions and illustrations.
Check out the end of the post for a give-a-way and discount code!
 I was lucky enough to help test this pattern (that's Sophia you see on the 'cover') and now I'm lucky to be a part of the tour. This go around I made two swimsuit cover ups for my girls. But this top is very versatile...it could be made fancy or casual, summery or will be perfect for layering in the fall/winter. Check out my other versions over at Sew Cool for the Tween Scene.
 They are doing swim team this summer and wanted something to throw on while they have to wait for the other to practice.  I used jersey knit for the tops and a light weight terry cloth like fabric (it was from my mom's stash, so who knows how old it is and what it actually is) for the bottom.
 The only thing I changed was that I lengthened the skirt portion by several inches, used the width of the fabric instead of using the suggested measurements and I didn't include the band at the bottom and I added pockets.
 While this pattern seems so basic, it leaves a lot open to add to it to fit your needs. And do you know what, this pattern cuts and goes together really fast!!! I loved that there are only printable pieces for the top portion. And then because the bodice part is lined all of the seams are hidden. I'm telling you it is a fast and efficient pattern that results in the perfect light weight summer top!
 For Clara I cut a size 8 and for Sophia a size 10. Clara's might be a little big (she was on the small size of the chart), but because it is just a cover up it works perfectly. The ruffle you see is from her swimsuit, just so you know.
 Really you should go and check out this pattern for yourself! And while you are at it, go and check out the other people participating on the tour!

"/
And Shannon is also having a great give-a-way! 

Sunday, June 15, 2014

Matinee Dress Tour Times Two

I have the wonderful honor to present to you the lovely Matinee Dress brought to you by Jennuine Design.
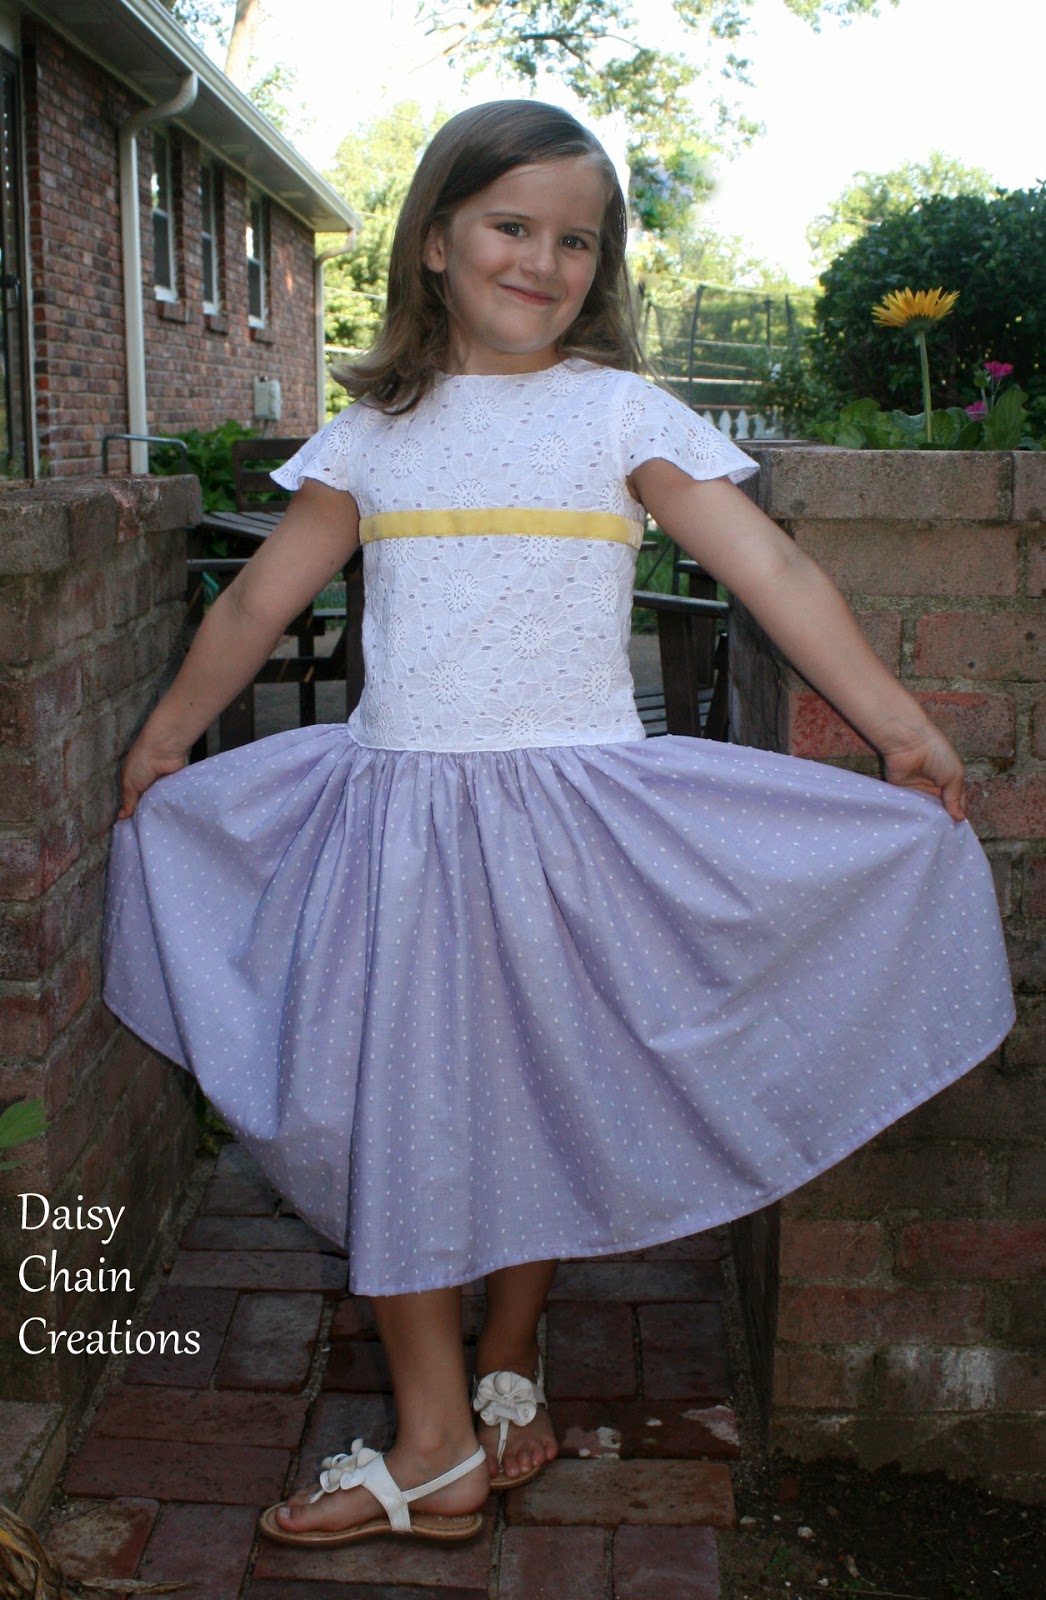
The pattern itself was a delight to work with...great illustrations and easy to follow instructions...but the finished product is the icing on the cake.  Just look how cute this dress looks! First I started with some amazingly soft Swiss dot in purple, Clara's favorite color. Then I added the lace overlay and velvet yellow ribbon for some contrast.
Then because it's a pattern tour, I had a little fun with the pattern and added a few changes, mostly to fill Clara's wishes for a dress.  The first change I made was to raise the back a little.  My girl's have never liked buttons on their backs, so I figured out a way to make it work without them.  For the sash I used velvet ribbon and just made a little bow that closes with a flat snap.
Here you can see how I altered the back. Just ignore the crazy printed lines...that was purely my fault, because I didn't know what I was doing when I printed out the pattern. Another great thing about the pattern is that you can print out just the size you need. I just forgot to click the button when I went to print and then I didn't want to waste the paper, but printed on the wrong side, which led to some confusion with all of the lines.
Another thing I did was to add a significant amount of fullness to the skirt.  I did this because part of Clara's request was that the dress be nice and twirly, but also because I just wanted to use up the great fabric and I really didn't know what else I would use it for.
One final thing that I did was to add a little fullness to the sleeves so they would be more "fluttery". Here you can see how I did that. I also just used one layer, finishing the edge of the sleeves instead of lining them, because the lace looked so pretty on it's own.
 And there you have my first version of the Matinee Dress.
As for my second version, I wanted to see if I could make it out of knit. I love how this version turned out too and Clara loves how comfortable it is.  And it did work with knit. However, the blue knit has only about 25% stretch (it was some old stuff I got from my mom) and therefore I think that is why it worked...not sure if it would really work with something that had more stretch.  I was also very generous with the seams as well, so I was probably taking in more than 3/8ths of an inch.
For the sleeves and the hem of the skirt I used a lettuce edge hem.  I also only used one layer on the sleeve again, as well as add a little to the width. And again, I raised the back piece as well.
For the sash, I used a ribbon and attached it under the arms with hooks and eyes. I was kind of perplexed on how to attach a ribbon on to the knit and keep the stretch of the knit without distorting it.
This also means the dress can be worn without the sash for a more casual look.
One final thing that I made was a braided head band from 3 strips of knit. I just sewed the ends together after braiding enough to fit her head. Again, another hit...it's nice to get 3 for 3 every once in a while.
Thanks Jenn for letting me be a part of the tour!
Now for all of the fun stuff...here's the list of who is participating on the blog tour:
Displaying Matinee Blog Tour.jpg
And here is who is contributing to the great prize package as part of the give-a-way:
Displaying Matinee Giveaway Collage.jpg
And here is your chance to win:
a Rafflecopter giveaway
Disclaimer: All opinions are purely my own, but I did receive a free copy of the pattern to try it out.

LinkWithin

Related Posts Plugin for WordPress, Blogger...