Here it is, my first ever tutorial. As my son gets older the dilemma of what to make him for Christmas (every year each of the kids gets a homemade gift from me) gets harder. What do you give an 11 year old boy when your talents lie in the sewing/crafting department? This year I came up with what I thought was a clever idea. Seeing as he is a precocious reader, who is always bringing a book to the table and always searching for something to use as a bookmark, I thought this fit the bill. We'll see what he thinks in a couple of weeks. My idea--a book cover that has a bookmark and some handy other things as well.
To start out you need to gather your supplies and measure 2 books, as the amount of felt you need is determined by how big you need to make it. I used the paperback version of 'My Side on the Mountain' and the hardback version of 'Mysterious Benedict Society'. You will also need a snap, a piece of ribbon, thread to match and interfacing.
1. Cut out your pieces. Your main pieces are: 1. The inner piece which is the size of your bigger book opened + 1/2 an inch. 2. Interfacing the same size as piece #1. 3. The outer piece which is the size of the inner piece + 2/3rds more (it will get folded in to make the 'pockets' to hold the bigger book...look ahead to see the finished product if this doesn't make sense). You will also cut 2 inner pockets which are about the size of the cover of the smaller book + 1/2 inch (lay the book open to measure), the pocket for the back which is a rectangle and a triangle-make sure it is not bigger than the cover of your big book. Cut your ribbon to go from the top to bottom of your inner cover + 2 inches. You can also cut out embellishments.
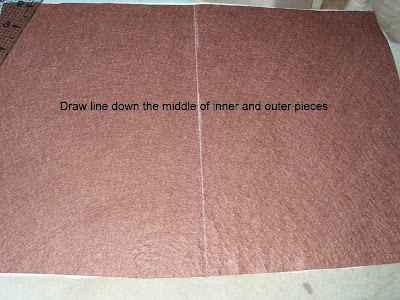
 2. Fuse interfacing if needed and draw a line down the middle of the inner and outer pieces for reference.
 3. Pin inner pocket pieces to inner piece and interfacing. Sew around 3 sides. For placement, open book and line binding up with middle line.
 4. Sew snap onto back pocket. Then attach pocket to outer piece, with a piece of interfacing on the opposite side. To find placement place book in the middle and fold flap into book. The pocket should go on to what will be the middle of the back side.
 5. Sew 3 lines down the middle of inner, interfacing and outer pieces.
 6. Now is the time to add embellishments so the backside of the embroidery is hidden. Also pin the ribbon right next to the 3 lines of sewing on the right side. You can add an embellishment on the end of the ribbon or finish it with something to keep it from fraying.
7. Pin and then sew around the inner piece to secure. Fold in outer flaps to make the bigger pockets and pin. Sew around the entire thing again, following the seam from when you sewed around the inner piece but making sure to catch the upper and lower edge of the big 'pocket'.
8. Finish edge. I used pinking shears or you could use a blanket stitch.


What a fantastic book cover! I am definitely using this soon, maybe just for me! lol
ReplyDeleteThis is awesome. When I'm home I can make it. I have felt still from the Hungry Caterpillar!
ReplyDeleteAdd a book light and we are set...
Any suggestions for a 6 year old boy!
Very cool! Finding gifts for readers can be so frustrating... but maybe I should give this a try. Thanks for the post!
ReplyDelete