
So a couple of weeks ago I learned I was the lucky winner of one of the Abilmente Prize packages given by Annika over at Naeh-connection (seriously, I felt like it was Christmas morning) and part of the package was this lovely bundle of Cotton and Steel "At the Zoo" from The Fat Quarter Shop.

I decided that the fat quarter bundle would be perfect to make this pieced Betty Skirt, since I get to be part of the Betty Skirt Tour.

The lovely ladies over at the Shaffer Sisters have put out this great basic skirt pattern that has tons of options. The Betty Skirt makes a great go-to skirt because it's simple to make, but the pattern allows you to personalize it to suit your needs.

I chose to do the large pleated option, but decided to make each pleat a different fabric from the bundle. This worked out perfectly because the longer width of the fabric was exactly twice what I needed, therefore the front and back pleats are exactly the same.
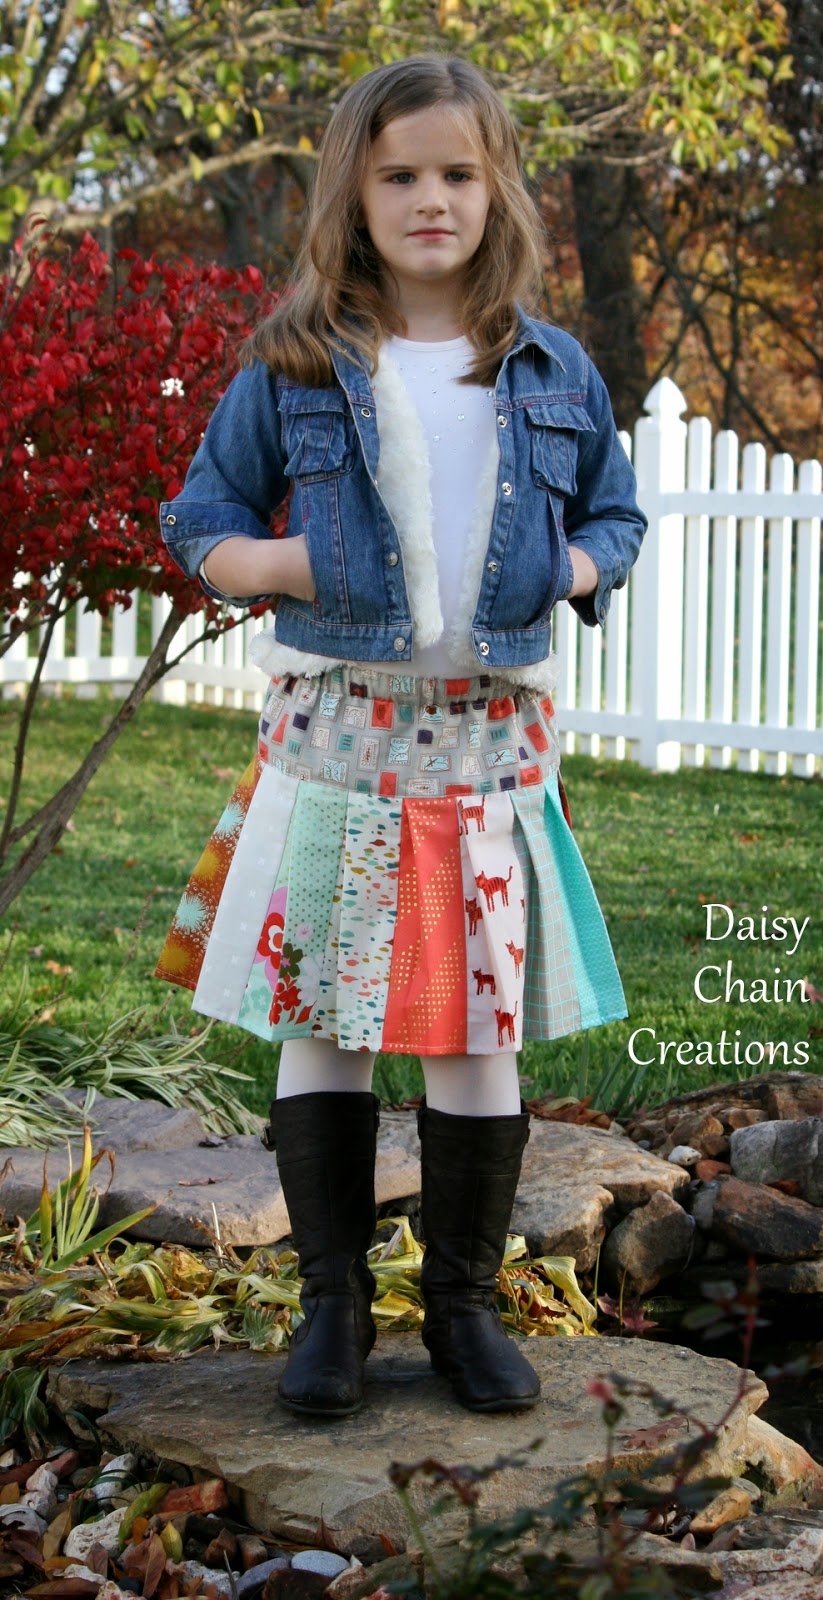
To get the pleats, I took the measurement of the pleat guide between pleats and added a seam allowance of 1/2 an inch, cutting the strips to the length I needed. Then I sewed them all together, pleated it (using the seams as a guide...no marking needed) and added it to the yoke.

This silly girl loves how it turned out. Even my 11 year old likes (and since they kind of wear the same size...I think she has her eye on it). The fabric was lovely to work with and such a visual treat!

As for the Betty skirt...you just need fabric and elastic (you do need buttons for the one with the placket) and that is it! It comes together fast, comes in a huge range of sizes, and has well written instructions.

Another plus...it's got great twirling factor...that means a lot in this household.

So if I've piqued your interest, you should go and check out the other stops on the tour...there's been some beautiful creations, and then go and buy it yourself with the discount code!
Now for a slightly random change of subject...this is my normal camera lens (it is just the kit lens...nothing special). It wasn't working so thanks to the invention of YouTube I thought I'd try to fix it myself. It was going to cost more than a new one (and the cost of the camera itself, since I bought it used) to get it fixed, so I thought I'd give it a go. I figured out the problem, ordered the part and all that is left is for the part to arrive and me to hopefully assemble it back together perfectly:) I've been using my distance lens for my pictures the last little while...there's been a learning curve, but I do like how some of them are turning out.

What a cute skirt! Good luck with the lens!
ReplyDeleteLOVE the skirt! Such great fabric. It makes all the difference in the finished product doesn't it?! Okay. Camera lens dissection? Wow. That is impressive. Looking forward to seeing the reassembly ;-)
ReplyDelete