Showing posts with label creation. Show all posts

Friday, January 9, 2015

In Black and White

So it's been a while...with the holidays (can you say 3 different concerts?!), camera not working, sick kids, life...and...and...it's been a while. But I am going to be better...

I thought I'd share what is on my mind at the moment though...it's cold here and I still haven't put up window coverings of any kind. While we have fairly good windows, I wonder if having some sort of curtain up would help in the whole heating department.  Not sure if it would or not, but it sure would help in feeling that the rooms were "completed". 
That's what I have on my mind...curtains.
I've ventured into curtains before and plan to reuse those, but I need some new ideas as well.
These I made from some vintage handkerchiefs...still love how they turned out!
I find that I'm still drawn to the simple white with black lined details, like this one from Ikea
SISSELA Fabric IKEA
Or this one from Ikea:
STOCKHOLM Fabric IKEA
And not only am I drawn to black and white, but to the more organic looking designs verses the actual patterns.  This is probably why I'm drawn to doodling like this: 
My Christmas present to myself, found on Amazon.
So my thinking is going down this road: I wonder if I could design/draw my own fabric. I have a bunch of white (same fabric used in the handkerchief curtains actually) and I'm thinking with a sharpie I could come up with something that is not only really cool, but really unique.
The question is, is it doable? 

Thursday, August 28, 2014

Another Flip of the Sis Boom Ethan Shirt Pattern

Since it's such a great pattern I had to give it another go...
my second FLIP for the ladies over at Frances Suzanne.
And whew! I made it by the hair of my chinny chin chin. 
Yes this is another FLIP of the Sis Boom Ethan Pattern. Much different from my other FLIP.
 This time it's a dress with an Asian flair.
 I left off the collar and just used the collar stand to create a Mandarin collar.
 I added 2 pockets, made it dress length, and cuffed the sleeves with a tab.  All accented with black piping. 
 She likes it. I like it...although it kind of reminds me of Sound of Music.
 You should really check out this pattern...it's a great one with so many possibilities!

Wednesday, June 25, 2014

Summer Fun with the Breeze Top Tour

Are you looking for a great summer top that is easy to make and perfect for summer in so many ways? Well the Breeze Top/Tunic just might be the one you are looking for! Shannon of Little Kids Grow has produced another solid pattern that is sure to become a staple for the summer wardrobe.
The top has a simple lined razorback yoke that was surprisingly easy to sew, as Shannon does a great job with instructions and illustrations.
Check out the end of the post for a give-a-way and discount code!
 I was lucky enough to help test this pattern (that's Sophia you see on the 'cover') and now I'm lucky to be a part of the tour. This go around I made two swimsuit cover ups for my girls. But this top is very versatile...it could be made fancy or casual, summery or will be perfect for layering in the fall/winter. Check out my other versions over at Sew Cool for the Tween Scene.
 They are doing swim team this summer and wanted something to throw on while they have to wait for the other to practice.  I used jersey knit for the tops and a light weight terry cloth like fabric (it was from my mom's stash, so who knows how old it is and what it actually is) for the bottom.
 The only thing I changed was that I lengthened the skirt portion by several inches, used the width of the fabric instead of using the suggested measurements and I didn't include the band at the bottom and I added pockets.
 While this pattern seems so basic, it leaves a lot open to add to it to fit your needs. And do you know what, this pattern cuts and goes together really fast!!! I loved that there are only printable pieces for the top portion. And then because the bodice part is lined all of the seams are hidden. I'm telling you it is a fast and efficient pattern that results in the perfect light weight summer top!
 For Clara I cut a size 8 and for Sophia a size 10. Clara's might be a little big (she was on the small size of the chart), but because it is just a cover up it works perfectly. The ruffle you see is from her swimsuit, just so you know.
 Really you should go and check out this pattern for yourself! And while you are at it, go and check out the other people participating on the tour!

"/
And Shannon is also having a great give-a-way! 

Sunday, June 15, 2014

Matinee Dress Tour Times Two

I have the wonderful honor to present to you the lovely Matinee Dress brought to you by Jennuine Design.
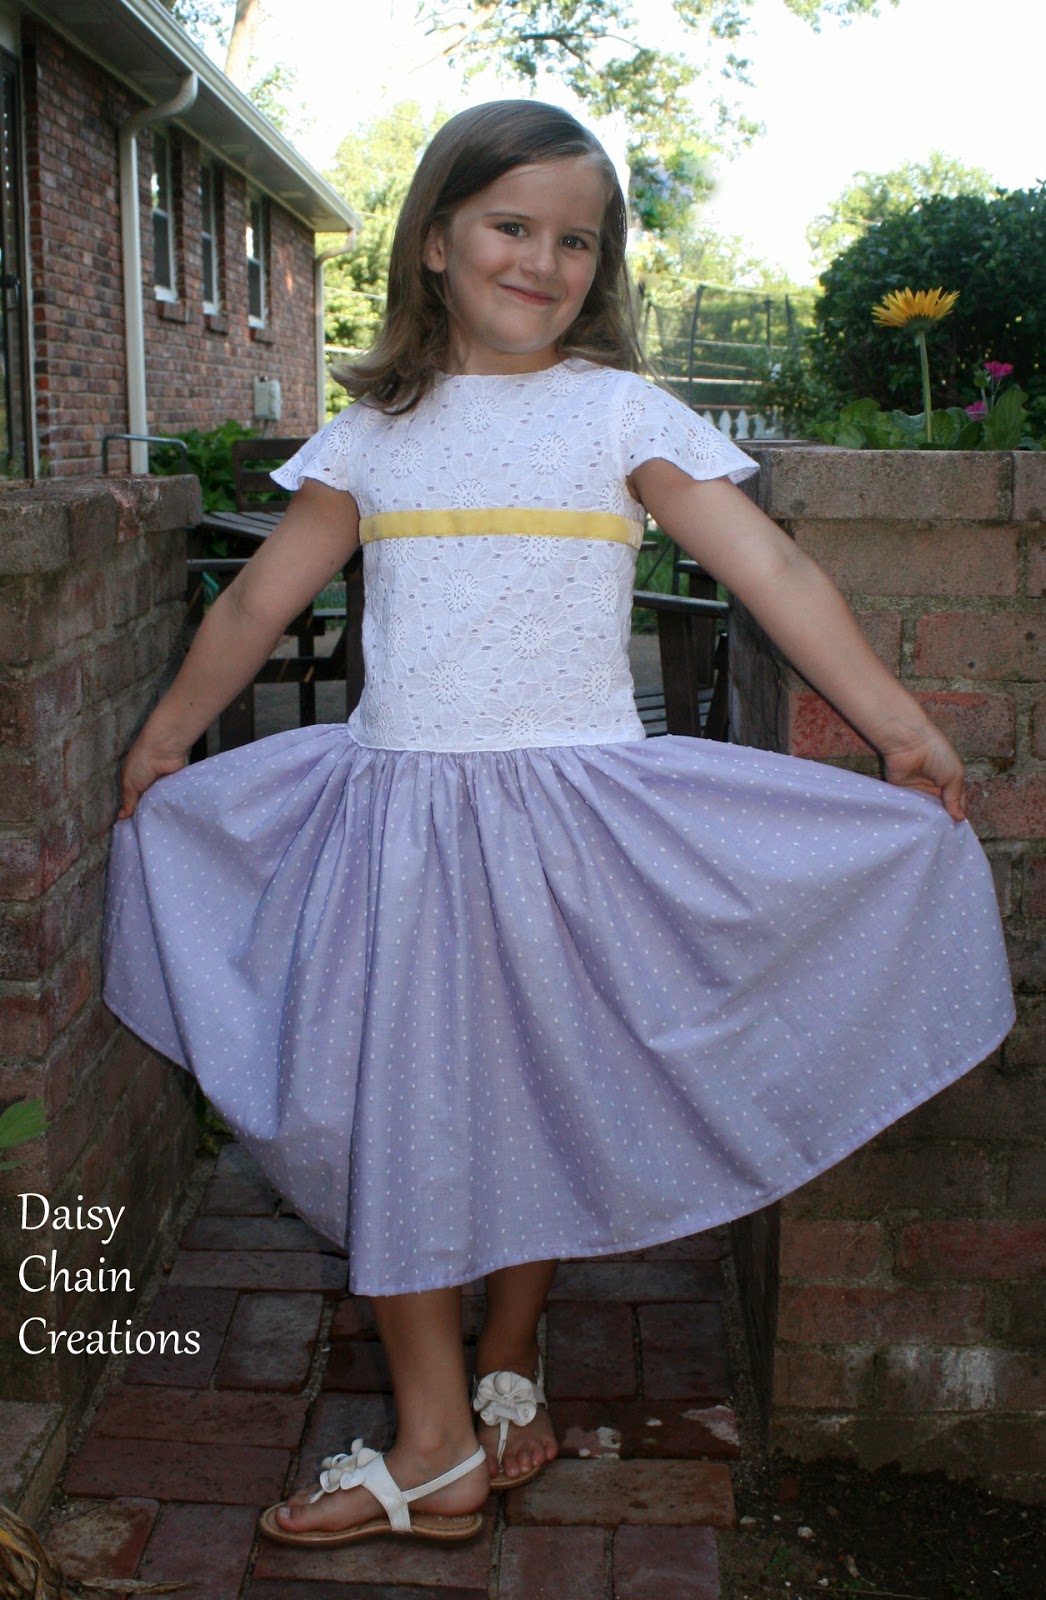
The pattern itself was a delight to work with...great illustrations and easy to follow instructions...but the finished product is the icing on the cake.  Just look how cute this dress looks! First I started with some amazingly soft Swiss dot in purple, Clara's favorite color. Then I added the lace overlay and velvet yellow ribbon for some contrast.
Then because it's a pattern tour, I had a little fun with the pattern and added a few changes, mostly to fill Clara's wishes for a dress.  The first change I made was to raise the back a little.  My girl's have never liked buttons on their backs, so I figured out a way to make it work without them.  For the sash I used velvet ribbon and just made a little bow that closes with a flat snap.
Here you can see how I altered the back. Just ignore the crazy printed lines...that was purely my fault, because I didn't know what I was doing when I printed out the pattern. Another great thing about the pattern is that you can print out just the size you need. I just forgot to click the button when I went to print and then I didn't want to waste the paper, but printed on the wrong side, which led to some confusion with all of the lines.
Another thing I did was to add a significant amount of fullness to the skirt.  I did this because part of Clara's request was that the dress be nice and twirly, but also because I just wanted to use up the great fabric and I really didn't know what else I would use it for.
One final thing that I did was to add a little fullness to the sleeves so they would be more "fluttery". Here you can see how I did that. I also just used one layer, finishing the edge of the sleeves instead of lining them, because the lace looked so pretty on it's own.
 And there you have my first version of the Matinee Dress.
As for my second version, I wanted to see if I could make it out of knit. I love how this version turned out too and Clara loves how comfortable it is.  And it did work with knit. However, the blue knit has only about 25% stretch (it was some old stuff I got from my mom) and therefore I think that is why it worked...not sure if it would really work with something that had more stretch.  I was also very generous with the seams as well, so I was probably taking in more than 3/8ths of an inch.
For the sleeves and the hem of the skirt I used a lettuce edge hem.  I also only used one layer on the sleeve again, as well as add a little to the width. And again, I raised the back piece as well.
For the sash, I used a ribbon and attached it under the arms with hooks and eyes. I was kind of perplexed on how to attach a ribbon on to the knit and keep the stretch of the knit without distorting it.
This also means the dress can be worn without the sash for a more casual look.
One final thing that I made was a braided head band from 3 strips of knit. I just sewed the ends together after braiding enough to fit her head. Again, another hit...it's nice to get 3 for 3 every once in a while.
Thanks Jenn for letting me be a part of the tour!
Now for all of the fun stuff...here's the list of who is participating on the blog tour:
Displaying Matinee Blog Tour.jpg
And here is who is contributing to the great prize package as part of the give-a-way:
Displaying Matinee Giveaway Collage.jpg
And here is your chance to win:
a Rafflecopter giveaway
Disclaimer: All opinions are purely my own, but I did receive a free copy of the pattern to try it out.

Tuesday, May 20, 2014

Traveler's Dress--Selfish Sewing

Update--I'm using this post as my 2 cents over at the Shaffer Sisters and Call Ajaire Sew-a-bration of Womanhood series.
It's all about celebrating the chance we have to use our talents for ourselves as well.  You should check it out...they really have a great line-up of amazing women!
~~~~~~~~~~~~~~~~~~~~~~~~~~~~~~~~~~~~~~~~~~~~~~~~~~~~~~~~~~~~~~~~~~~~
Does anyone else get a little self conscience putting pictures of themselves up for all to see? Well I do...but this dress is finally finished and I want to document it. Plus sewing for one's self is kind of fun and I want to encourage others to do it too!
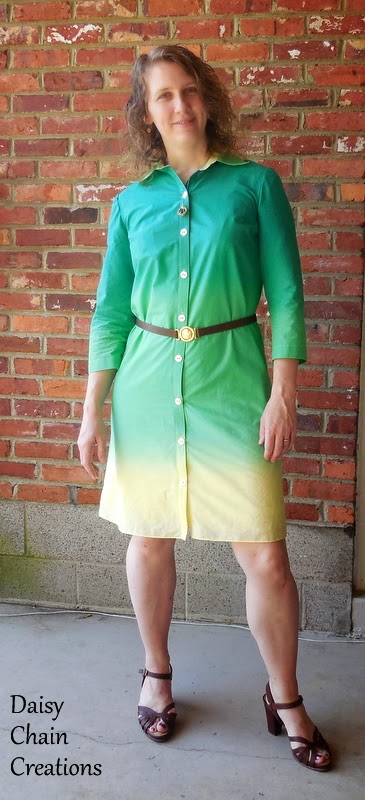
The fabric is something I picked up at Textile Fabrics last summer. You can see the various shades that go from the darker green (shoulders) to the yellow (legs). I carefully cut the placket and sleeves so that they would match. The collar is just what was left over.
 The pattern was classic Lisette style...easy to follow and well written. However, I take issue with the lack of collar stand. She kind of did a pseudo collar stand that was just part of the collar and I did not like the way it looked or laid (it seems like she does this with a lot of her patterns). So I spent an entire movie picking it out and then drafted my own collar stand as well as a new collar ( I kind of used the pattern piece as a reference for that one). The new one looks so much better than the first. I like the way it lays and looks. 
 And as for the dress...I got a lot of comments on it at church today. That being said...this was not a great dress for sitting down. Standing up this dress fit perfectly and there was even wiggle room. Sitting down, it would gape at the placket. So I'm not sure if it's me or the pattern. Another interesting thing, thanks to my very pale legs that kind of blended in with the yellow at the bottom...my husband thought this dress was much shorter that it really is. So if you want to create the illusion of having a short dress on, just match the bottom color with your legs:)

Friday, February 21, 2014

Betty Skirt Times Two

 The lovely women over at Shaffer Sisters have just released their first pattern, The Betty Skirt and I was one of the lucky ones to get to sew it first.
 It is a wonderful, classic staple of a pattern with 4 variations of a yoke based skirt.  Just think of the possibilities!!! I tried out the gathered version as well as the front placket version and Clara loves both of them.
 The great thing about this pattern, besides that it is well written and helpful, is that it is so versatile. This is a pattern that will grow with your daughter, starting at 12 months and going all the way up to 10 years old. The other nice thing is that you can customize it to fit your daughter. You are not stuck to standard sizes, but can go by her measurements.
 I would highly recommend this pattern that is looking to get back into sewing or might not have a lot of sewing experience because it makes a great beginner pattern. It will teach you some skills that will be useful later on as well.


Monday, February 10, 2014

Woodland Fairy--Another Birthday Present

 Here's another birthday present for one of Clara's friends. This time a girl version of the woodland theme. 
Again, the fairy idea was from here,  the rabbit from here, the owl from here and the rose from here. She also got the 2 trees and a little fairy baby wrapped up in a 'leaf' and a silk square to set everything up on.
I've decided I really need to get a good stash of good wool felt. I'm kind of addicted to making these and need more colors. They are fast, fun and useful in a way. And they are hand work, which I always like to have something to work on while I'm waiting at dance or piano lessons. 
 Here's a close up of the fairy and a look at her wings...not exactly sure what fairy wings should look like, but I had fun coming up with this one.

Thursday, February 6, 2014

Asymmetrical French Country

Weird title for a signature look, right? Well there's a story. But first let me tell you how hard it was to get these pictures...sick kiddo and frigid weather (why oh why didn't I have the outfit done when it was 65 degrees 4 days ago?!). But we did it and may I present:
Asymmetrical French Country
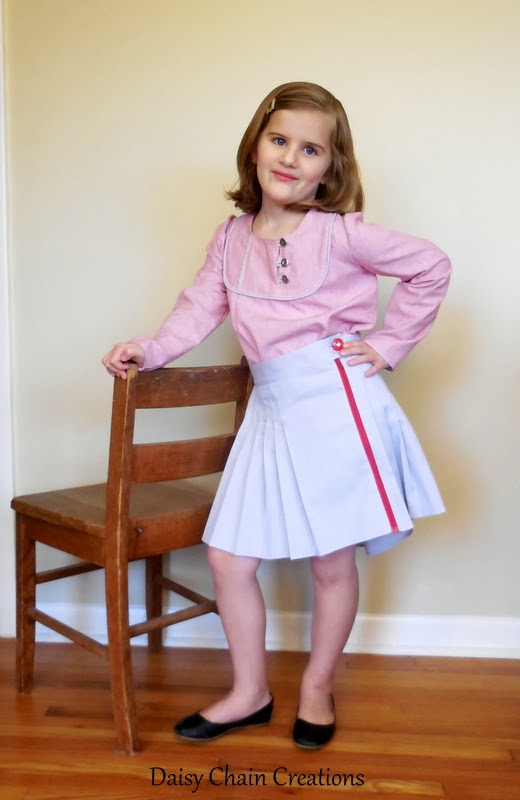
 Now for the outfit and the story behind the name.  It started with a gray shirt my husband was getting rid of (this outfit almost became the one for last week). I looked at the gray fabric of the shirt and envisioned this skirt with a separating red zipper down one side. I think I've liked the gray and red color combo ever since seeing this family picture session over at Design Mom. 
Well the skirt evolved a little to include pleats and the natural curve of the back of the shirt and a button with a little bling that Clara picked out from my button stash. 

I've always had a thing for the French kids clothing companies (my favorite is Bonpoint). And as my outfit evolved, it seemed to fit what I saw in their lines, so hence the French Country look.
 The thing about me is I'm not really bold when it comes to my sewing. I rely on the little things to grab your attention. Instead of bright colors or bold patterns, I go for the subtle eye grabbers. That is where the asymmetry comes in. I wanted the zipper offset to the side. I wanted to yoke to meet at the side of the shirt, so everything became asymmetrical.

And as I sketched out the outfit, I thought about how asymmetry draws your eye in and how that works really well for this little gal of mine and here is the story. When she was born, she appeared to be cross eyed, but as she grew the next couple of months they noticed that although she appeared to be cross eyed (especially in pictures) she didn't test for being cross eyed. Finally they measured from the middle of her nose to where her eye starts and it turns out they are not symmetrical. The flap of skin is just a little wider on one side when compared to the other. What does this mean? Nothing except she appears cross eyed in pictures and people are drawn to her big blue eyes. Turns out we humans like symmetry and when something is just a little off our human brains are then focused on that. Her big blue eyes will always get noticed because of that (not sure if that will be a good thing when she is a teenager:). And this little outfit, will hopefully catch your eye as well.
 The outfit consists of 5 things:
1. Gray skirt from men's button up shirt with red, separating zipper---makes it seem like a wrap around skirt in a way.
2. Simple, self drafted peasant top from red and white striped shirting (JoAnn's), with gray piping, off set buttons and off set pleat.
3. Blue knit leggings self drafted from another pair of her's
4. Knit hat from my own pattern with cool yarn that had sparkly sequins
5. Leg warmers from a sweater that didn't get used for last weeks look
There is definite mix and matching potential with a lot of things from her wardrobe.
 And here are a couple more pictures of this cute gal of mine as well as some close ups of the outfit. 
 She really wanted a picture where it looked like she was holding the suitcase like she was getting ready to leave. 
And there you have my signature look for Project Run and Play.


LinkWithin

Related Posts Plugin for WordPress, Blogger...