Toothbrush/Overnight
Roll
Here is a printable copy of the instructions--Sowing While You Sew--Week 3

Objectives:
1. Learn the importance of back stitching to secure things. Explain how a couple of back stitches at the
beginning and end of a line of stitching keeps it from coming undone.
2. Practice sewing a straight line.
3. Become familiar with sewing with different types of fabric.
4. Learn how to sew multiple layers together by pinning and then
removing the pins while sewing.
Supplies:
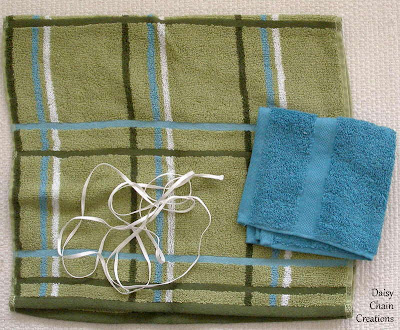
-Hand towel
-Washcloth
-Ribbon, cording or rope—long enough to go around the roll when it
has stuff inside of it
-Thread to match
Here's the how to:
1. This project will
actually make 2 complete rolls. First,
you want to cut both the towel and the washcloth in 2 equal halves.
2. Attach the washcloth to the towel. Lay cut edges together and center the
washcloth in the middle of that side.
Attach with a simple straight stitch, have them start with a couple of
stitches forward and then secure with the same amount of back stitches. Do this at the end as well. When
working with terrycloth (what most towels and washcloths are made out of) the loops of the fabric can get caught in
the tip of the sewing machine foot. This
will then make it hard to continue sewing in a straight line. If this happens, just look behind the foot and
snip the stretched out loop. You’ll just
want to be watching for this.
3. Now open up the towel and washcloth and refold so that the seam
is on the inside. Adjust the washcloth
up a little (about a half inch or so, depending on how big you made the seam),
so that you can fold under the sides of the towel that are exposed on each side
of the washcloth to create a nice finish.
4. Pin the 2 sides of the washcloth so that it lays nice and
flat on the towel. Pin a couple of times
in the middle as well to keep from shifting. Pin the bottom edges of the towel
that are on each side of the washcloth under as well.
5. Start at the top corner of the washcloth (sewing over the finished corner of the washcloth is a little bulky,
which will make it a little difficult, so start about a ¼ inch in from the
side). Sew down the side, making
sure to secure the first couple of stitches with a couple of back stitches. When you get to the bottom of the washcloth,
make sure the sides of the towel that are not under the washcloth are folded
under in a neat hem. Pivot and sew out to the side of the towel. Back stitch to secure.
6. Repeat on the other side.
7. Decide how big you want to make the pockets (think about size
of toothbrush, toothpaste, brush/comb, etc).
Start at the bottom, secure with back stitching and sew up to the top,
secure with back stitching.
8. Repeat step 7 until you have all of the pockets made.
9. Make sure your ribbon/cord/rope is long enough to wrap
around the roll.
Fold in half and secure
to the outside of the towel (opposite side the washcloth pocket is sewn on to)
about level with the top of the washcloth.
Secure with going back and forth a couple of times with the back stitch.
10. Finish ends of ribbon/cord/rope with Fray Check or some
other method to keep from unraveling.
Ideas to make it a little more
challenging for someone that's a little older or might have some experience:
--Not sure if there is any way to make this one more challenging,
but these certainly make fun gifts, so they could make as many as they want and
have fun picking out the towels and washcloths to go with the person they are
gifting it to.


Love these. I've only ever made them using a wash cloth. I did applique their initials on the outside so I could remember which was which! Thank you for the directions.
ReplyDeleteWhat a great idea, I think I am making these before we head on a trip next time.
ReplyDelete